Qt Quick 3D DynamicMeters demo
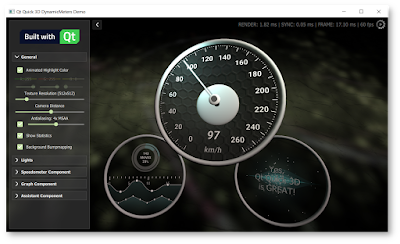
Lately we have been working to perfect the Qt Quick 3D for the 5.15 release. There are still some tweaking to do, but things are looking pretty nice already! In order to prove (to ourselves and to others) that Quick 3D is ready for the prime time, we have also been implementing some demos with it. Tomi already made a blog post about Quick 3D Benchmarking demo here , go check it out if you haven't already. This benchmarking application can be used to test many features of Quick 3D and to evaluate how different hardware can handle the load when the model count, complexity, texture sizes etc. are increased. Another demo we have prepared is called DynamicMeters. The main targets of this demo were: Demonstrate how Quick 3D and Qt Quick (2D) can easily be combined into single UX. While 3D is great, most applications want to combine also traditional 2D elements in different ways. Test how Quick 3D works together with 3rd party OpenGL libraries. Make sure that the performance is